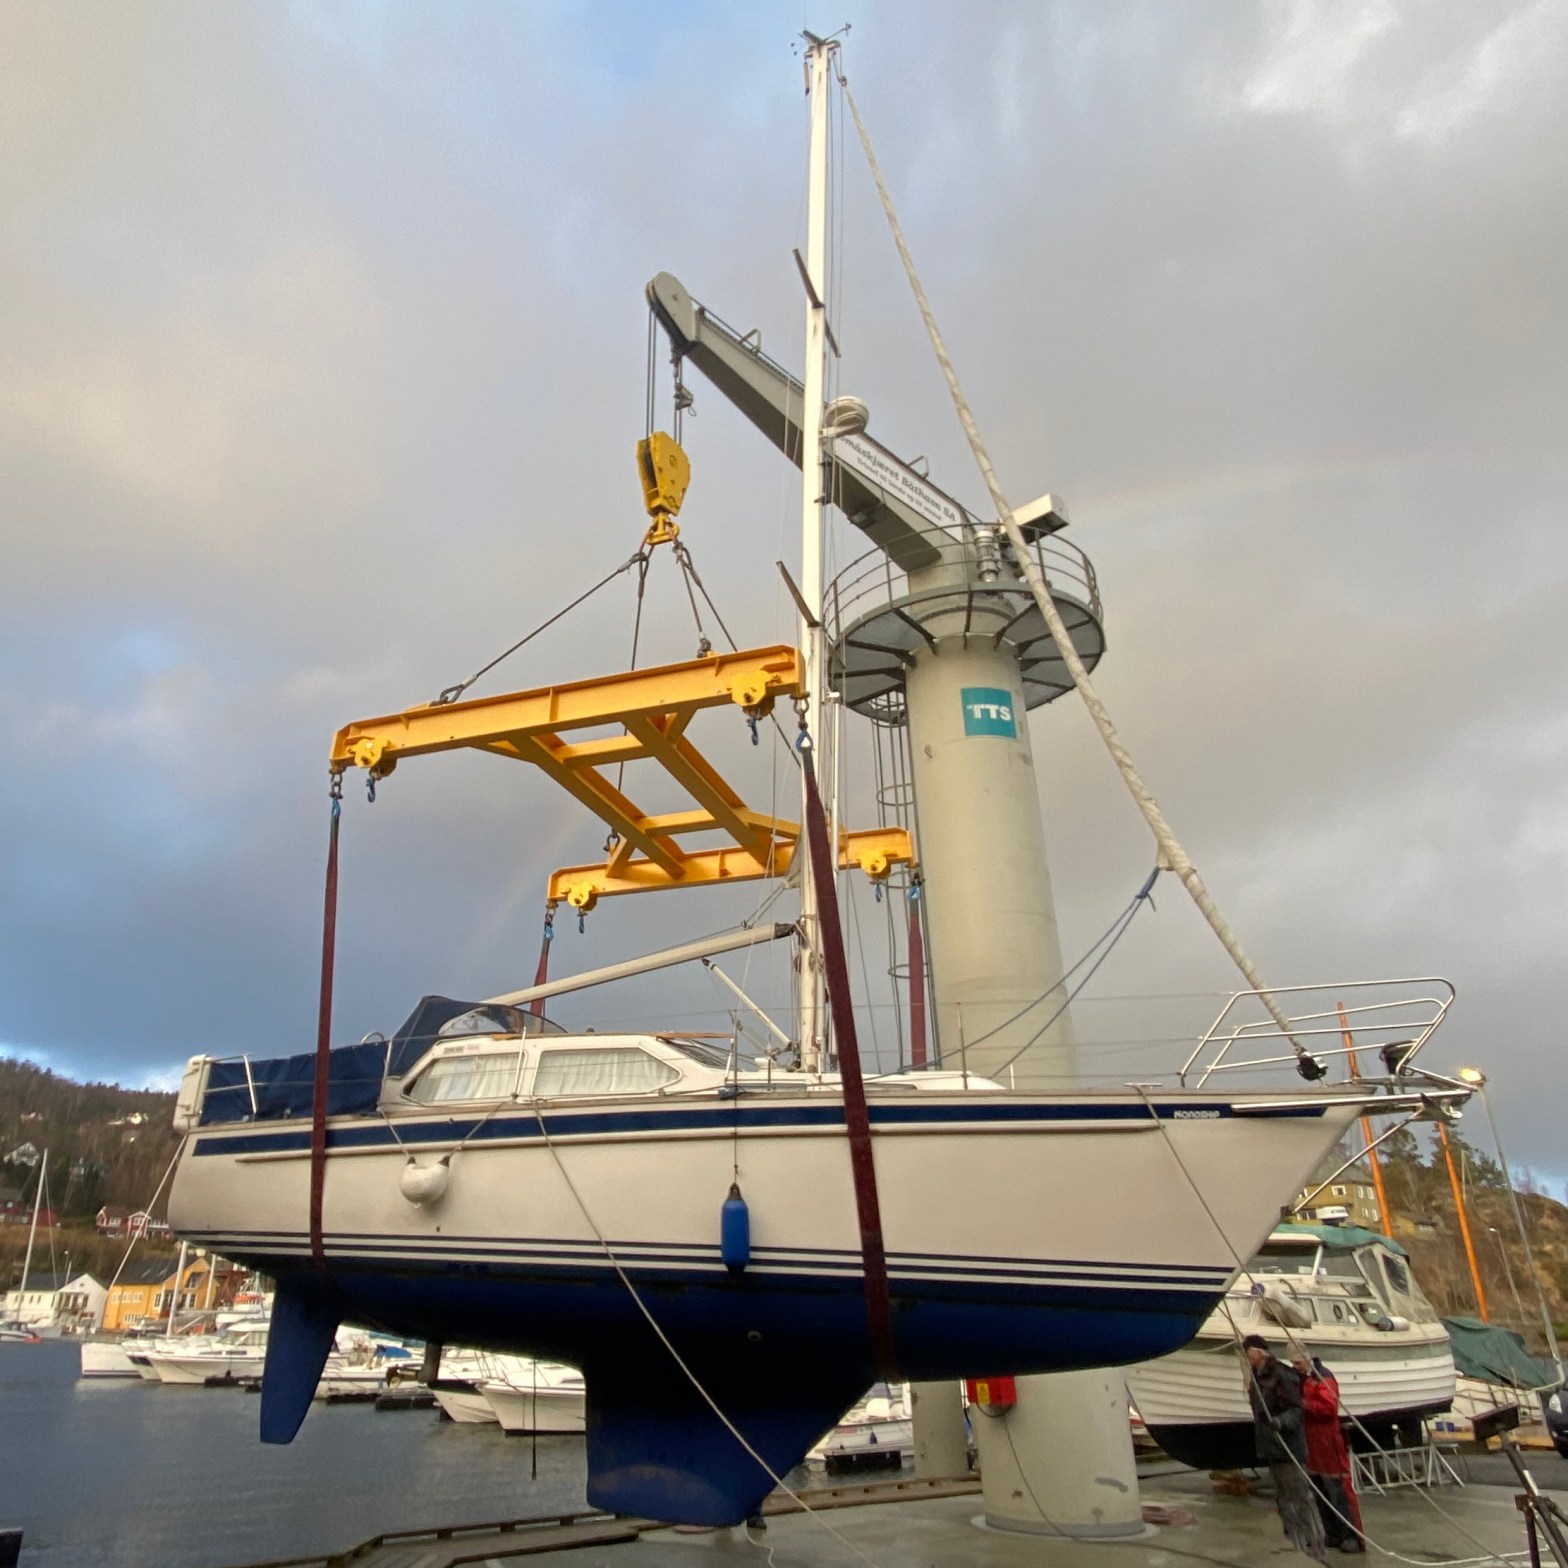
As mentioned in the post before there were some items which I wanted to have fixed right away. It is still winter and not the best weather to get out anyways. But also not too pleasant to work on a boat either.
Space on dry land is quite limited in our harbor, the nice thing is however, since working on boats at that time of the year is not too popular I had as much time as I wanted and did not have to rush things.
Upgrade to Composite Seacocks
While we inspected the seacocks on our visit I got an idea that they were not in the best condition. Boats here are in the water year round. If the seacocks get used rarely or are from the wrong material they can seize up, or worse, fail and for example shear of at the through hull. The latter would have catastrophic consequences.
Waste Outlet 
Head sink 
Galley 
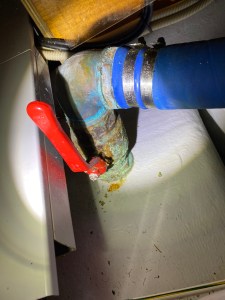
Handle Galley
Above you can see some of the seacocks before replacement. Especially the valve in the galley (last two pictures above) I was most worried most about. It did not look too bad on first sight from the front. But while trying to close it I suddenly held the handle in my hand. I took a picture of it from behind and it became immediately clear to me that there was a case of dezincification which is indicated by the purple discoloration.
What happens is that the zinc in the brass (a zinc/copper alloy), is lost from the material by corrosion. This happens either by galvanic corrosion as a result of the connection of two dissimilar metals and/or electrolytic corrosion the result of incorrect bonding. The end-result is that the most of the material remaining is only copper, which gives you a rather porous structure with little mechanical strength. That turn can lead to total failure of the valve/through hull.
Searching the web for the markings on the seacock, CW617N, yielded that this alloy is not corrosion resistant in saltwater. The reason, why they use these parts is price pressure. Some googling told me that a lot of boat manufacturers (even so called “quality”-manufacturers) use the same inferior materials. Here is a great article (pdf) about this issue, seacock alloys, and what materials to use.
I assumed that the through hulls are also made from the same material, except the one from the galley. The boat has a seawater-cooled fridge made by isotherm, with the cooling circuit routed through a special seacock below the sink. Here the manufacturer supplies detailed information alloy used in the part. You can even fit an own zinc anode for the seacock only (which I did of course).
Long story short: the seacocks and the through hulls had to be replaced so that I could sleep well on the boat. I would have really disliked waking up with water gushing into a sheared-of seacock.
Browsing through the different marine equipment stores here in Norway, both online and offline, revealed that it is impossible to determine which alloy you get when buying a brass seacock here. They simply don’t know or don’t care and just call it brass, the same with through hulls. In the UK and Germany you can buy “DZR”-dezincification resistant parts or you get some information about the alloy specification. Not here though, it is essentially a lottery.
That made the decision easy for me, i.e., I chose TrueDesign composite through hulls and seacocks which were readily available. The only metal through hull left is the corrosion resistant connected to the fridge.
I won’t go through the whole procedure on how to do the removal and installation. There are several excellent videos covering this. Sailing Britaly has very good, and very detailed explanation one on YouTube which can be found here. I employed his way of removing the old parts with the help of an angle grinder from the outside.
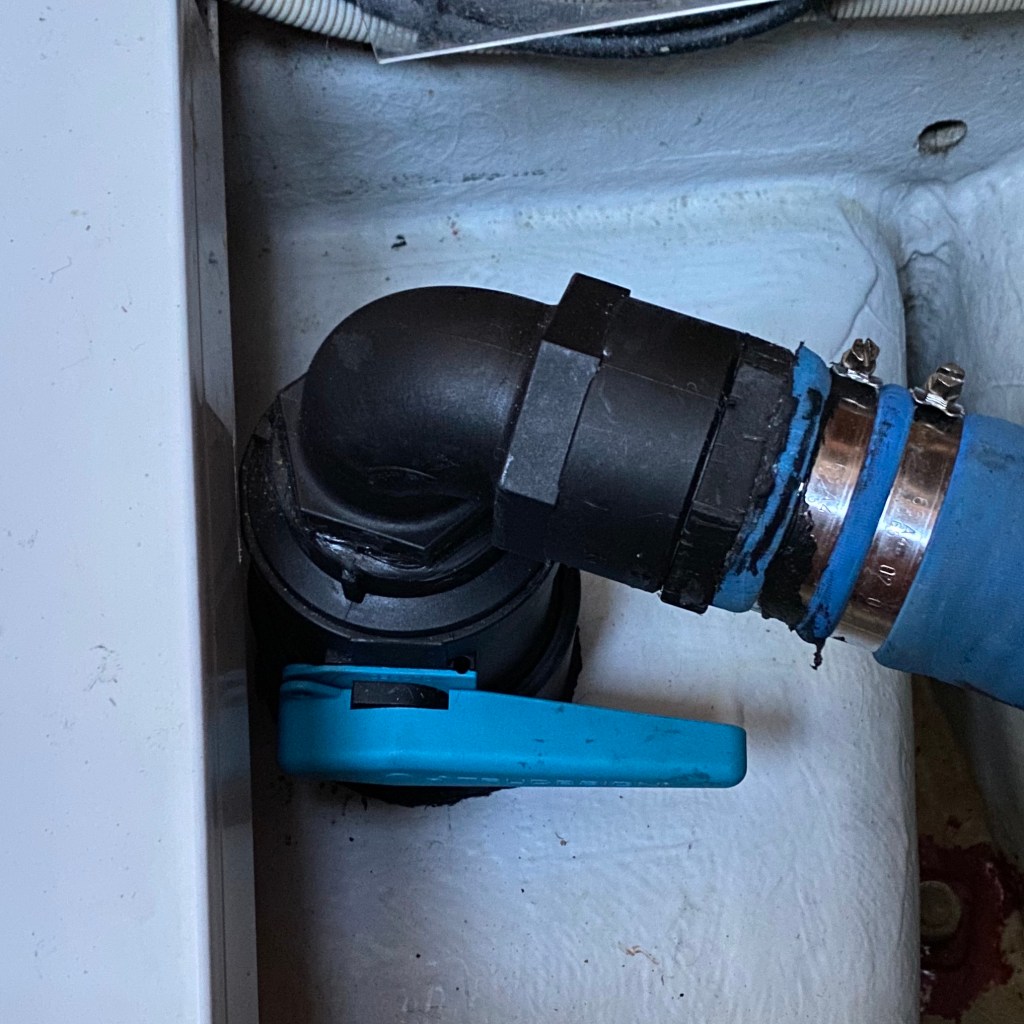
Then the two through hulls in the head (toilet and sink) where installed using TrueDesign’s recommended method of using epoxy. For those two I did not install a load bearing collar since you (or anything heavy) have to fall into a cabinet under the sink to risk mechanical damage to the seacock. A risk that I would call extremely improbable.
All other, more openly installed through hulls/seacocks, were installed using Sika 291i as sealing agent and got a load bearing collar.
Here the results:
Waste Outlet 
Galley 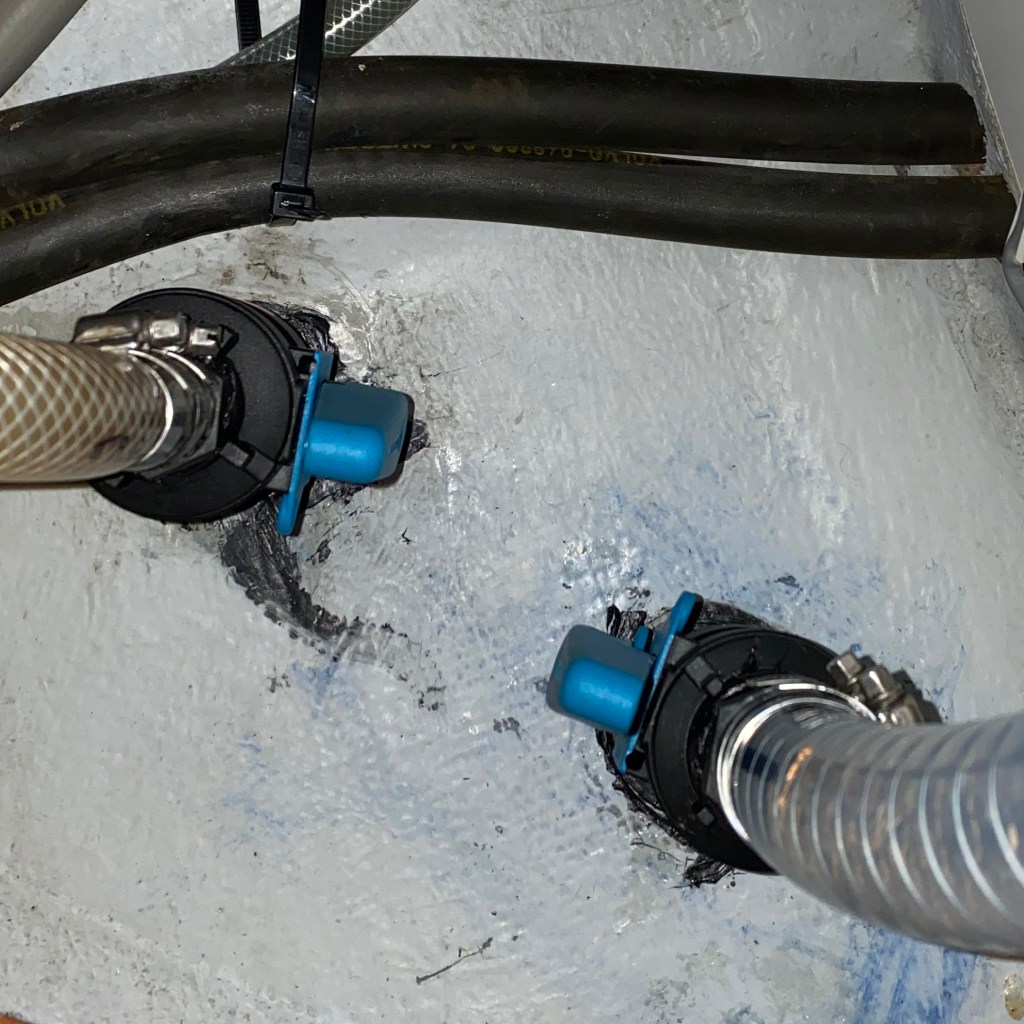
Head
I know I could have done a better job cleaning up …
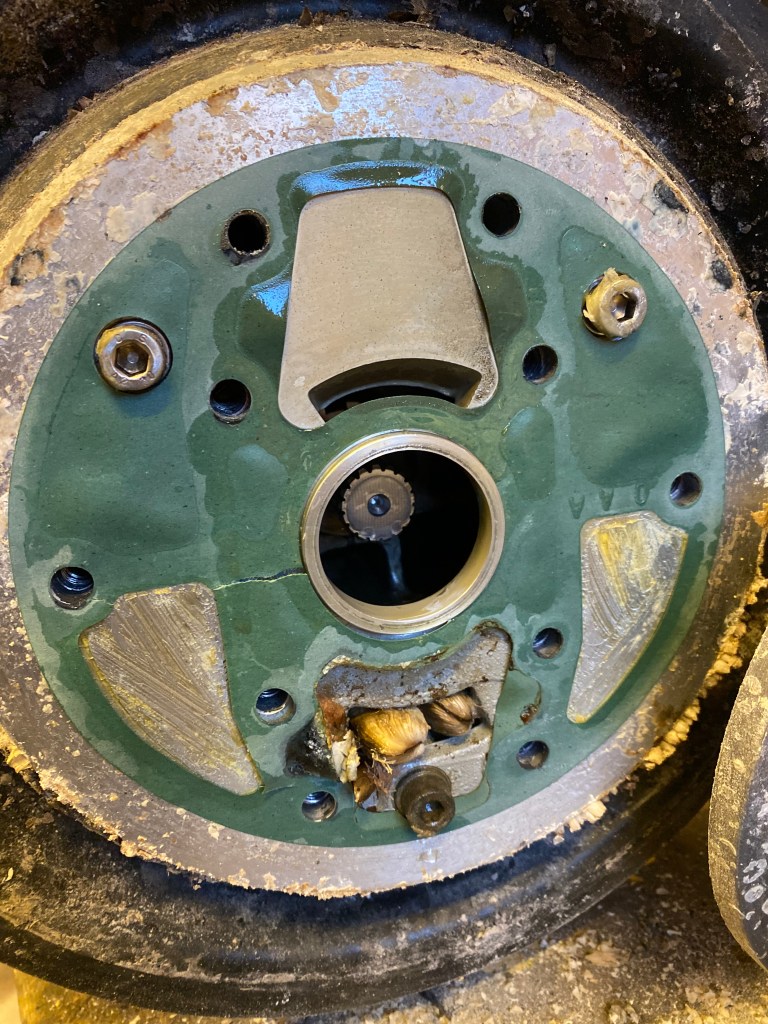
Volvo Penta Diaphragm Replacement
The diaphragm of this boat was not replaced for 18 years. Volvo recommends replacement of this critical part every 7 years. So after its more than 257% service life it was about time to change it. Again, I can only recommend watching Sailing Britaly with a more than 1 hour long video if you want to know how to do it.
Nevertheless, there are two things which I’d like to add. The first thing is that I was surprised how bad the growth can be inside the saildrive leg if you keep it in the water for 18 years. See for yourself.
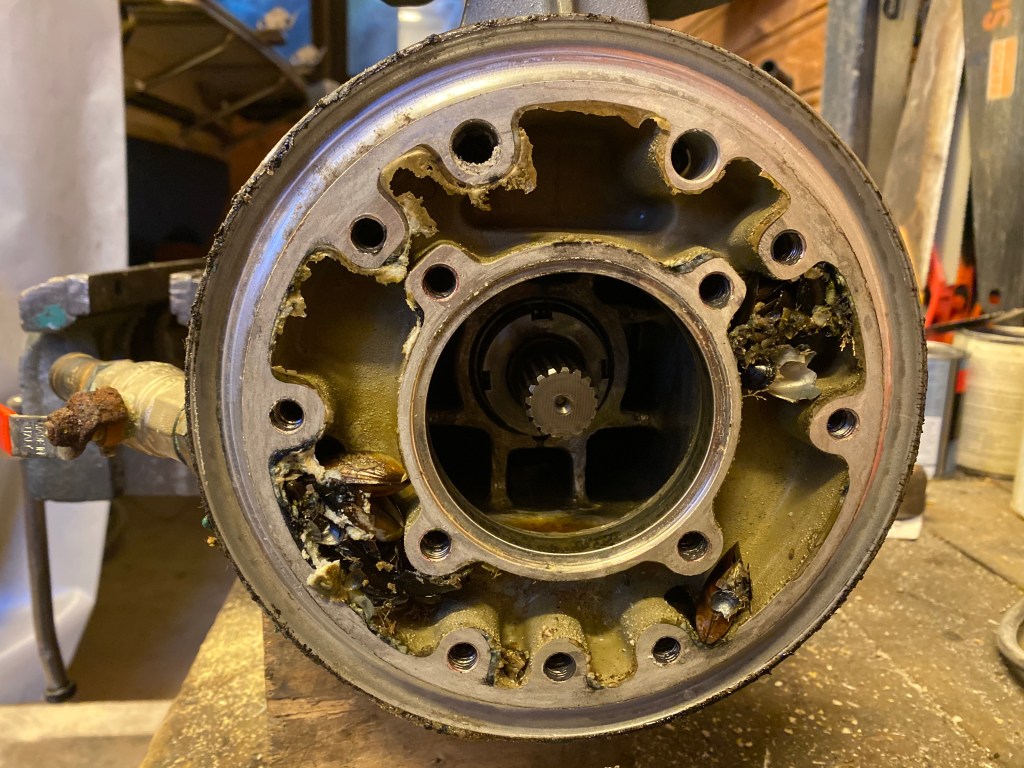
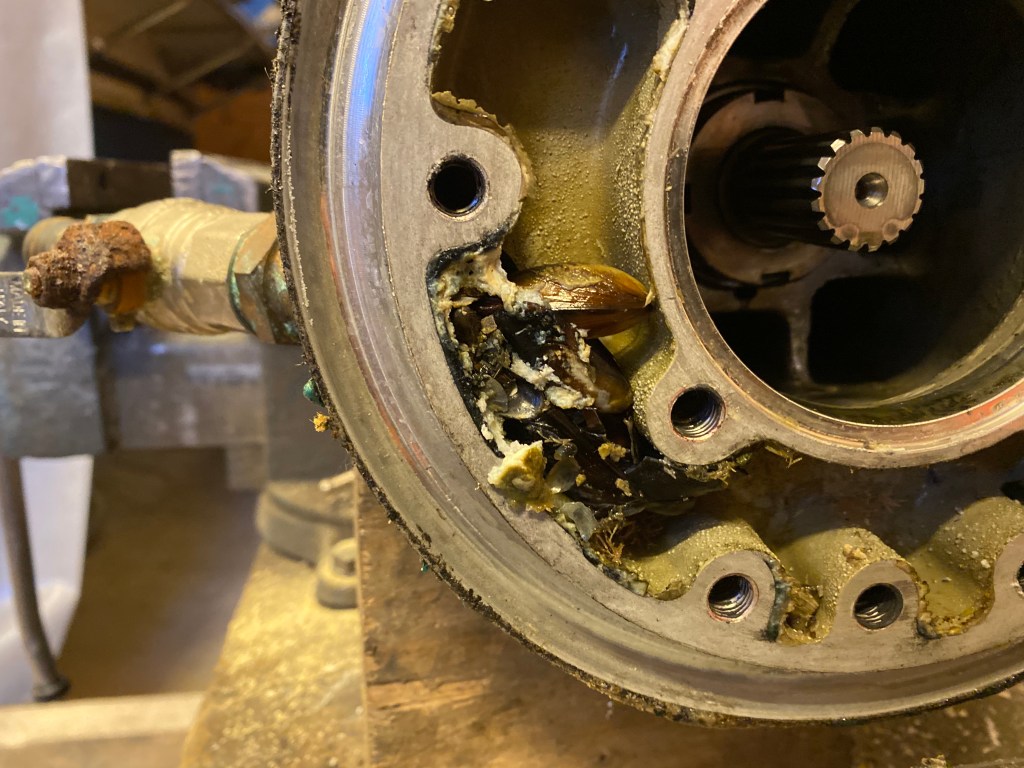
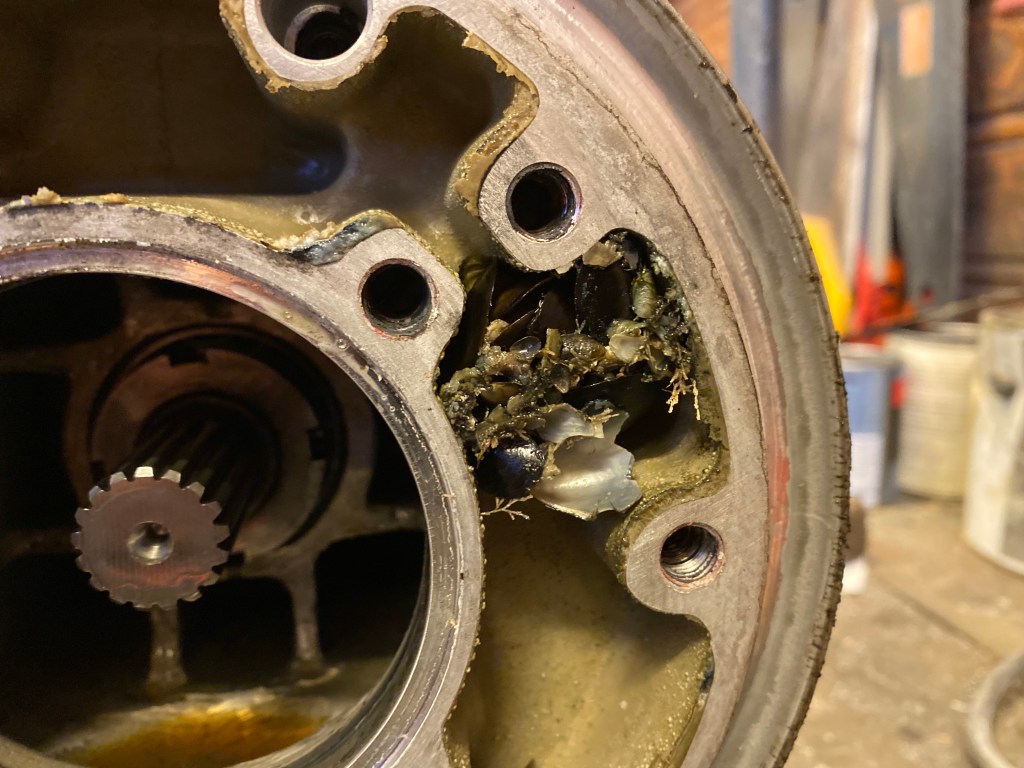
I removed probably two handful of these fully grown mussles from the inside of the saildrive. I can only imagine how much they impeded the flow of the cooling water.
The second thing is that reattaching of the saildrive to the motor is a two man job. And even then it was hard. Jens helped me again, but it took us the better part of an evening to get the drive aligned so that we could mate both parts properly without using excessive force. Maybe it will be easier the next time I do it, but that will be earliest in 2027 and for now I am just happy that everything works.
